If you’re importing products from Japan, you already know the product price. But do you know your real cost?
Many importers set their selling price based on the product price alone — then wonder why their margins are thinner than expected. The reason: they’re ignoring landed cost.
Landed cost is the total cost of getting a product from your Japanese supplier to your warehouse. It includes shipping, customs duties, insurance, and every fee in between. Getting this number right is the difference between a profitable business and one that’s bleeding money without knowing it.
This guide walks you through how to calculate landed cost step by step, with real examples for importing from Japan.
What Is Landed Cost?
Landed cost is the total cost of a product once it arrives at your door. It goes far beyond the price on your supplier’s invoice.
Here’s the full picture:
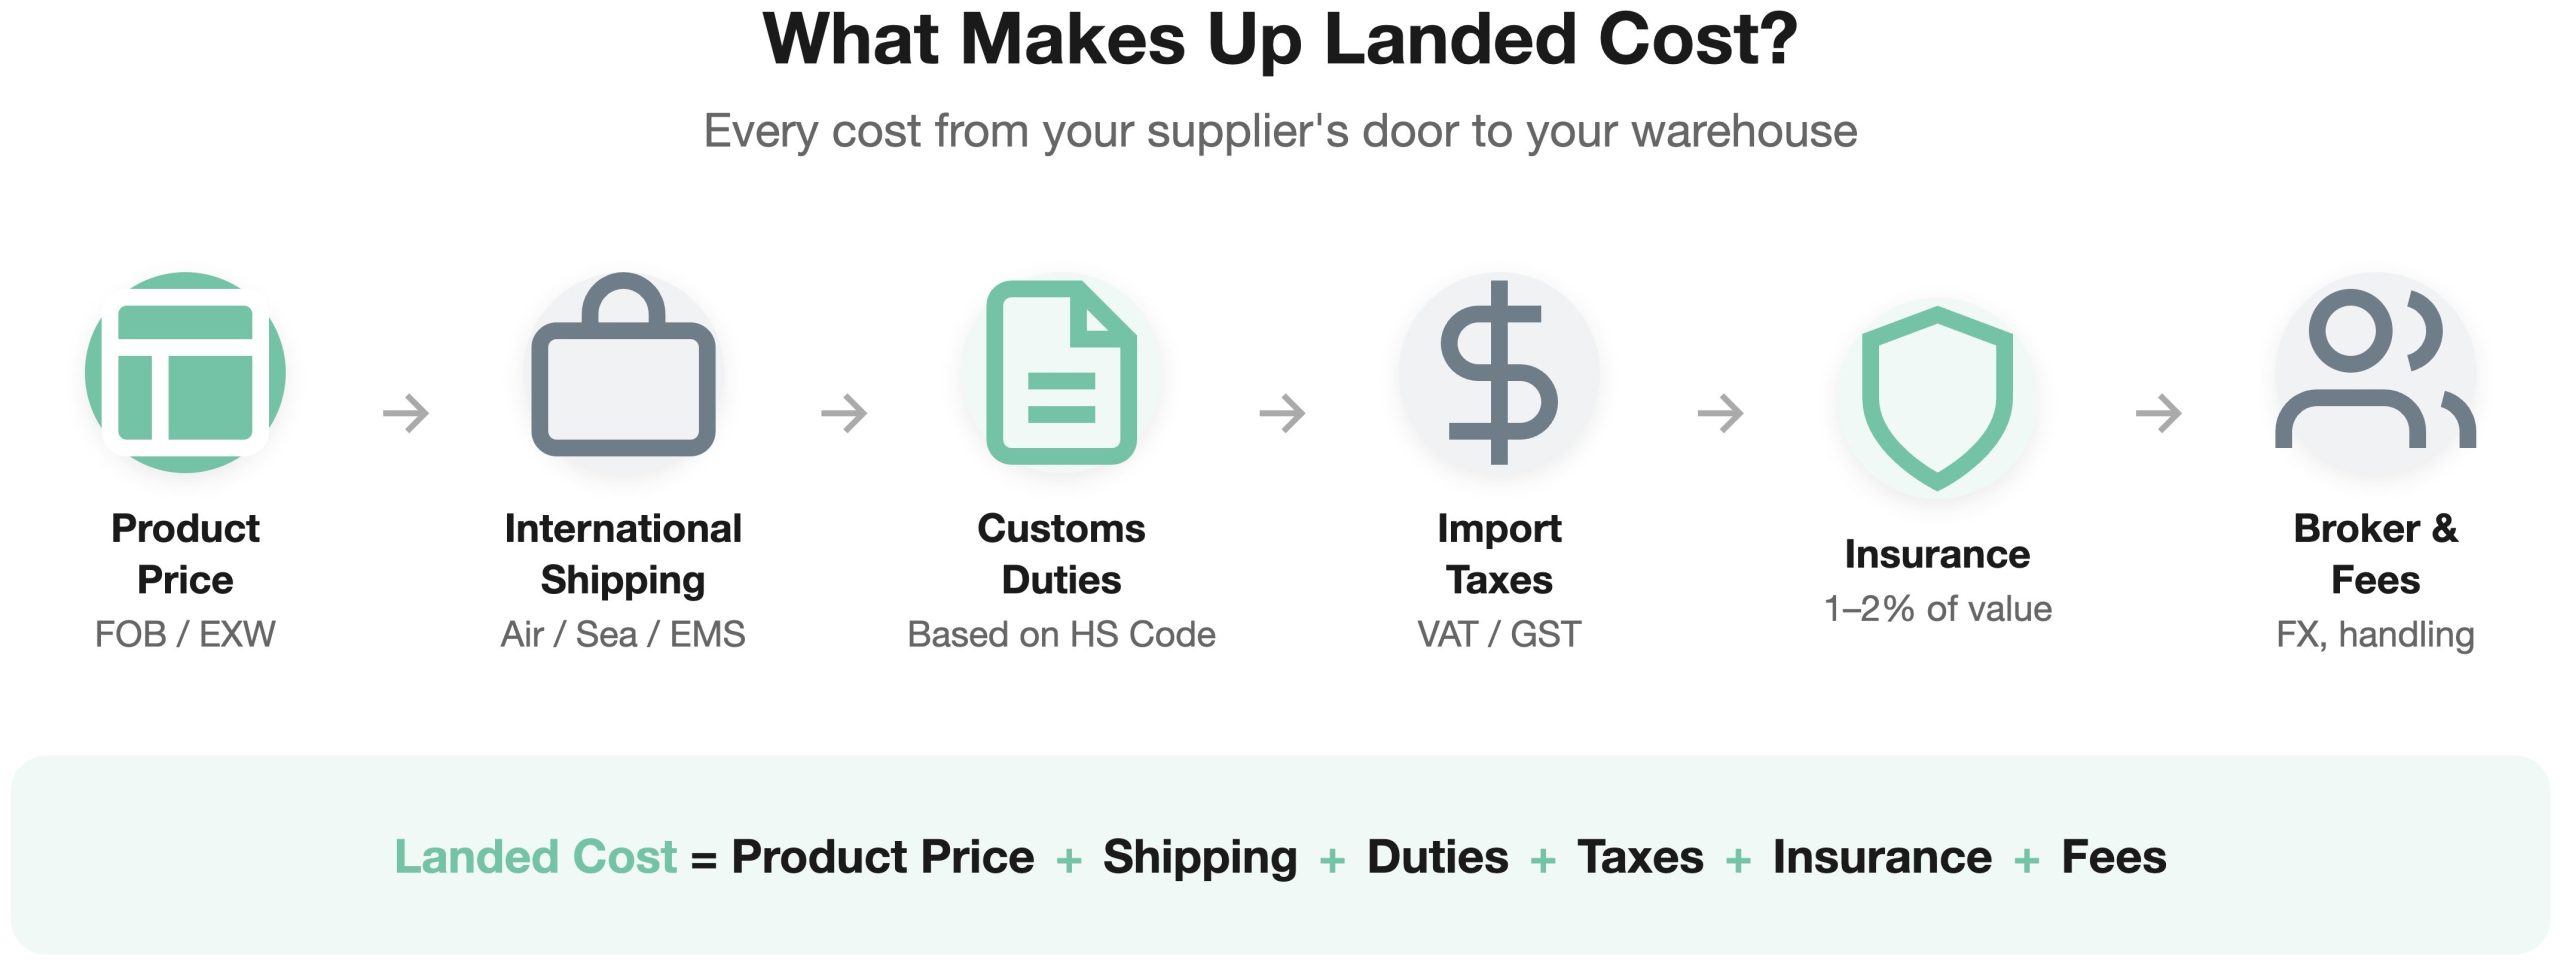
Landed Cost = Product Price + International Shipping + Customs Duties + Taxes + Insurance + Brokerage Fees + Other Handling Costs
For a product that costs ¥10,000 from a Japanese supplier, the landed cost might be ¥14,000–¥16,000 or more, depending on the product category, shipping method, and destination country.
If you’re pricing your product based on that ¥10,000, you’re already underwater.
The Components of Landed Cost
Let’s break down each component you need to account for.
1. Product Price (FOB / EXW)
The price your Japanese supplier charges. Pay attention to the trade term:
- EXW (Ex Works) — You pay for everything from the supplier’s door onward
- FOB (Free on Board) — The supplier covers costs until the product is loaded onto the ship/plane in Japan
- CIF (Cost, Insurance, Freight) — The supplier covers shipping and insurance to your port
Most small importers from Japan deal with FOB or EXW. Make sure you know which term applies — it changes what costs are already included.
2. International Shipping (Freight)
This is often the biggest variable. Factors that affect the cost:
- Shipping method — Air freight (fast, expensive) vs. sea freight (slow, cheaper) vs. express courier (DHL, FedEx, EMS)
- Weight and dimensions — Carriers charge by actual weight or volumetric weight, whichever is greater
- Origin and destination — Japan to the US West Coast is cheaper than Japan to Europe
- Fuel surcharges — These fluctuate and are added on top of the base rate
For small shipments from Japan, EMS (Japan Post) or express couriers are common. For larger volumes, sea freight through a freight forwarder is more economical.
3. Customs Duties (Tariffs)
When your product arrives in your country, customs will assess a duty based on:
- HS Code (Harmonized System Code) — Every product has a classification code that determines the duty rate
- Declared value — Usually the transaction value (product price + shipping for some countries)
- Country of origin — Japan has trade agreements with many countries that may reduce rates
Duty rates vary widely. Some products enter duty-free; others face 10–25% or more. Look up the rate for your specific product before you commit to importing.
4. Import Taxes (VAT / GST / Consumption Tax)
Many countries charge an import tax on top of duties:
- US — No federal VAT, but some states charge sales/use tax on imports
- EU — VAT (typically 19–27%) applied on CIF value + duties
- Australia — 10% GST on goods over AUD 1,000
- UK — 20% VAT on CIF value + duties
Don’t forget this — it can add a significant percentage to your landed cost.
5. Insurance
Cargo insurance covers loss or damage during transit. It’s typically 1–2% of the shipment value. Optional but recommended, especially for fragile or high-value Japanese products (ceramics, electronics, etc.).
6. Brokerage and Handling Fees
- Customs broker fee — If you use a broker to clear your goods (recommended for beginners), expect $50–$200+ per shipment
- Port handling / terminal fees — Charged by the port or airport for processing your cargo
- Warehouse / storage fees — If your cargo isn’t picked up promptly
7. Payment and Currency Conversion Fees
You’re paying a Japanese supplier in JPY (or USD). Either way, there’s a cost:
- Bank wire transfer fees — Typically $15–$45 per transaction
- Currency conversion markup — Banks charge 1–3% over the mid-market rate
- Payment platform fees — PayPal, Wise, etc. each have their own fee structure
These are easy to overlook but add up, especially on frequent small orders.
Landed Cost Calculation Example
Let’s walk through a real-world example.
Scenario: You import Japanese ceramic tableware from a supplier in Gifu, Japan, and sell it in the US.
| Component | Amount (USD) |
|---|---|
| Product price (50 units × $12 each, FOB Japan) | $600 |
| International shipping (EMS, 15kg) | $180 |
| Customs duty (HS 6912 — ceramic tableware, 0–9.8%) | $47 |
| Insurance (1.5% of product + shipping) | $12 |
| Customs broker fee | $75 |
| Bank wire fee + FX markup | $25 |
| Total Landed Cost | $939 |
| Landed Cost Per Unit | $18.78 |
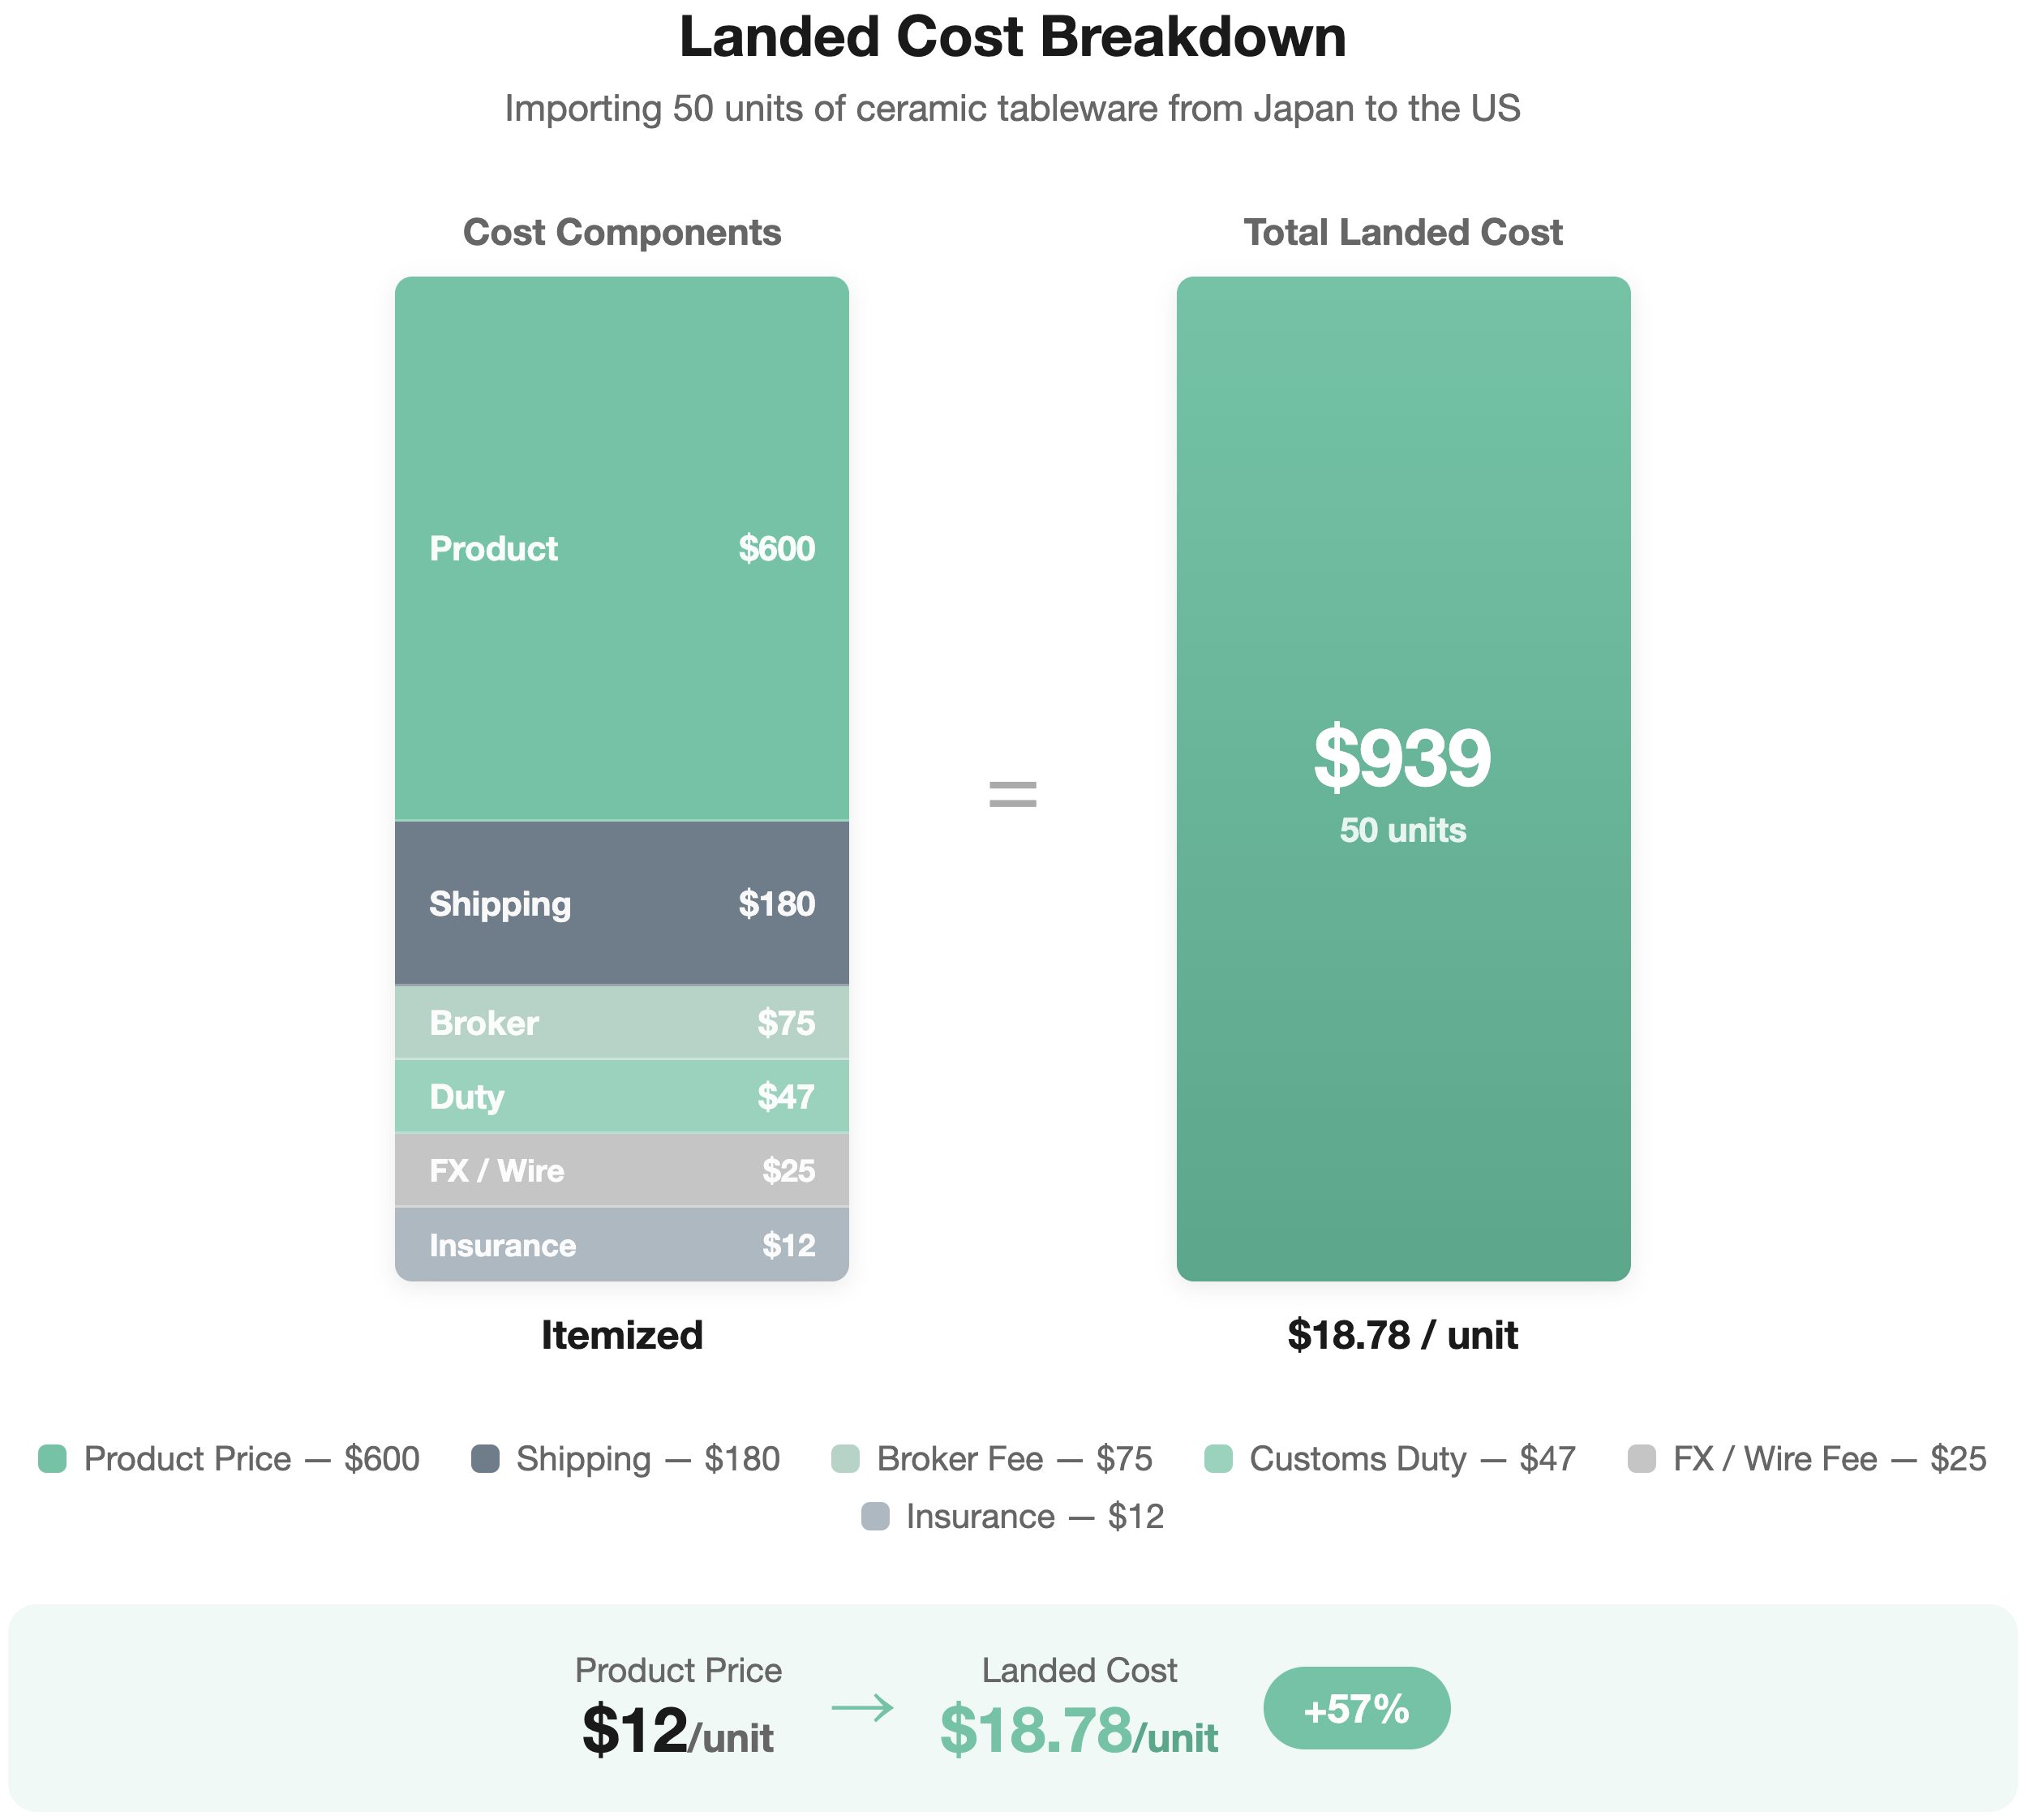
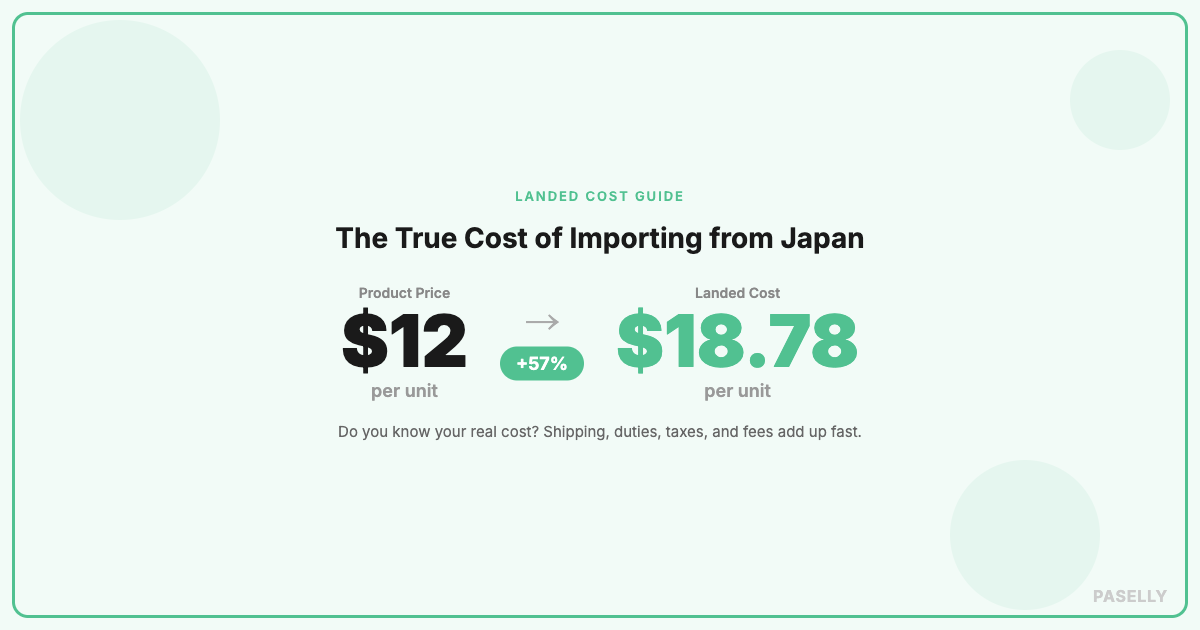
The product price was $12 per unit, but the real cost is $18.78 — 57% higher. If you priced your product based on the $12, your margins would be destroyed.
How to Allocate Shipping Costs Across Multiple Products
Here’s where it gets tricky for many importers: what if you ship multiple different products in the same shipment?
You paid one shipping fee, but you need to know the landed cost of each product. You need to allocate (or “prorate”) the shared costs.
Common Allocation Methods
Method 1: By Weight
Best when products vary significantly in weight.
Example: You ship 2 products in one box.
- Product A: 10 units, 2kg each = 20kg
- Product B: 5 units, 1kg each = 5kg
- Total weight: 25kg
- Shipping cost: $200
Allocation:
- Product A: $200 × (20/25) = $160 → $16 per unit
- Product B: $200 × (5/25) = $40 → $8 per unit
Method 2: By Value
Best when products are similar in size/weight but differ in value.
Example:
- Product A: 10 units × $50 = $500
- Product B: 5 units × $20 = $100
- Total value: $600
- Shipping cost: $200
Allocation:
- Product A: $200 × (500/600) = $167 → $16.70 per unit
- Product B: $200 × (100/600) = $33 → $6.60 per unit
Method 3: By Volume
Best when shipping charges are based on volumetric weight or when products vary in size but not weight.
Method 4: By Unit Count
Simplest method — divide equally by number of units. Only appropriate when products are roughly the same size, weight, and value.
Don’t Forget to Allocate Other Shared Costs Too
Shipping isn’t the only shared cost. Apply the same allocation logic to:
- Customs broker fees
- Insurance
- Handling and terminal charges
These are all per-shipment costs that need to be distributed across the products in that shipment.
Tips for Managing Landed Cost
1. Track It Per SKU, Not Per Shipment
Your accounting might track costs per shipment, but your pricing decisions need cost per SKU. Build a simple spreadsheet (or use inventory software) that calculates landed cost per unit for every product.
2. Recalculate When Conditions Change
Landed cost isn’t static. Recalculate when:
- Shipping rates change (carrier rate updates, fuel surcharges)
- Exchange rates move significantly (JPY/USD can swing 10%+ in a year)
- Tariff rates change (new trade policies, reclassification)
- You switch shipping methods or consolidate shipments
3. Negotiate with Your Supplier
Japanese suppliers often have preferred shipping partners with better rates. Ask about:
- Volume discounts on shipping
- Consolidated shipments (combining orders to reduce per-unit shipping)
- FOB vs. CIF pricing — sometimes it’s cheaper to let the supplier arrange shipping
4. Keep Records for Tax and Compliance
In most countries, you can deduct import costs as business expenses. Keep receipts and documentation for:
- Commercial invoices from your supplier
- Shipping receipts and bills of lading
- Customs entry documents and duty receipts
- Broker invoices
Common Mistakes When Calculating Landed Cost
- Ignoring currency conversion costs — The rate your bank gives you is not the mid-market rate. Factor in the spread.
- Forgetting about domestic shipping — Landed cost should include the cost of getting the product from the port to your warehouse.
- Using old duty rates — Tariff rates change. Verify before each large order.
- Not accounting for damaged/lost goods — If 2 out of 50 units arrive broken, your effective cost per sellable unit goes up.
- Calculating landed cost once and never updating — Exchange rates, shipping rates, and tariffs all change. Review quarterly at minimum.
Landed Cost Formula Summary
Per-unit landed cost = (Product Price + Shipping + Duties + Taxes + Insurance + Broker Fees + Handling + FX Costs) ÷ Number of Sellable Units
Get this number right, and you can set prices with confidence. Get it wrong, and you’ll wonder where your profit went.